 GCP VM with Cloud SQL and GCS
Install Kestra on a GCP VM with Cloud SQL Postgres database backend and Cloud Storage as internal storage backend.
Overview
This guide provides instructions for deploying Kestra on Google Cloud Platform (GCP). We’ll use Compute Engine with Docker to host Kestra server, a PostgreSQL Cloud SQL database and Cloud Storage as storage backend.
Prerequisites:
- basic knowledge about using a command line interface
- basic knowledge about Compute Engine, Cloud Storage and PostgreSQL.
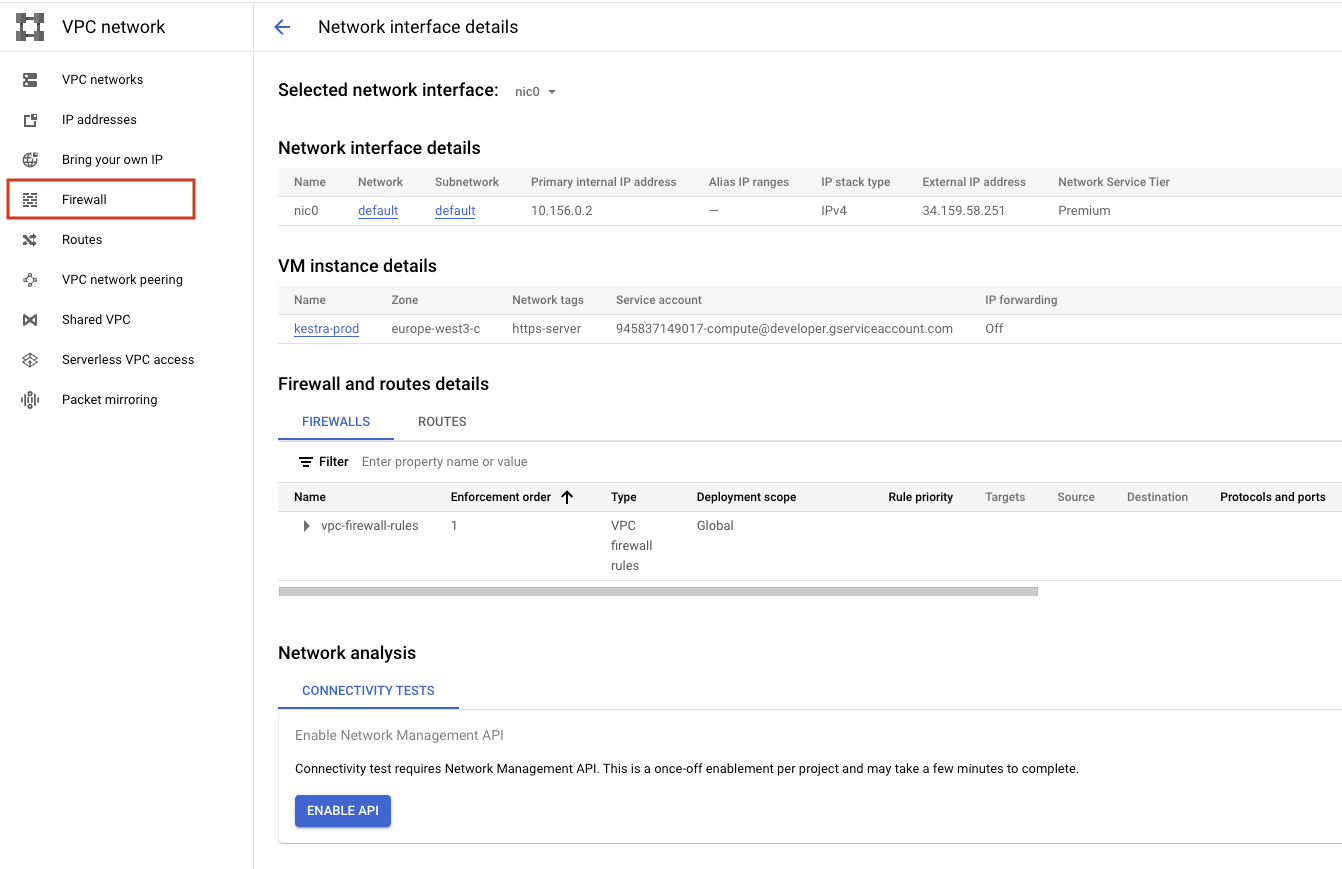
Create a VM instance
First, create a VM instance using the Compute Engine. To do so, go to the GCP console and choose Compute Engine.
- Click on the
Create Instancebutton at the top. - Give a name to your instance.
- Choose an appropriate Region and Zone.
- Choose the
General Purposemachine of theE2series. - Machine type: Kestra needs at least 4GiB Memory and 2vCPU to run correctly. Choosing the
Presetmachine typee2-standard-2is a good starting point. - Click on
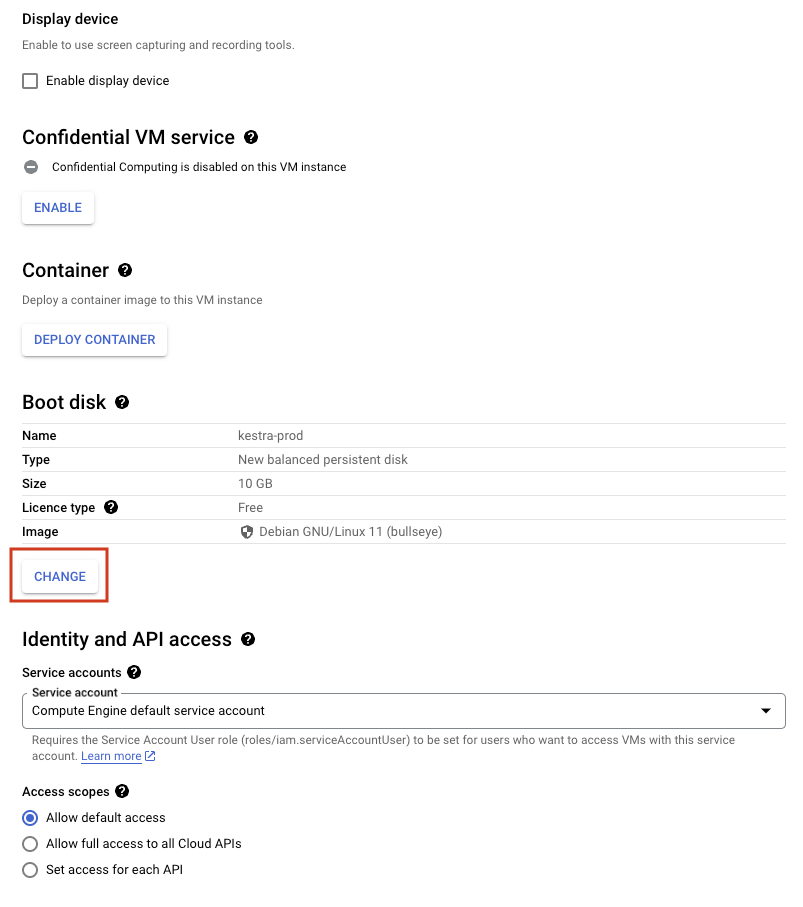
Changein the "Boot Disk" section, as we would like to change the image. - Under the "Public Images" tab, choose
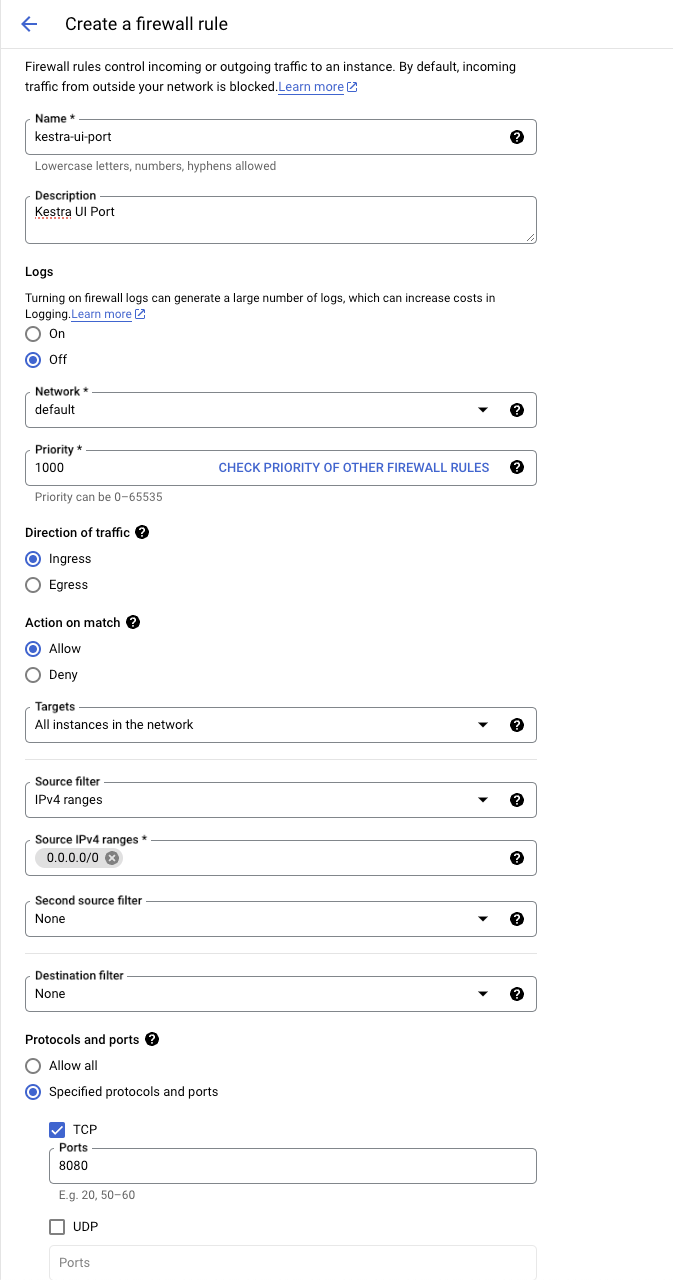
Ubuntuas the operating system and theUbuntu 22.04 LTSversion. - Continue with the "Allow default access" access scope, and select "Allow HTTPS traffic" in the Firewall section.
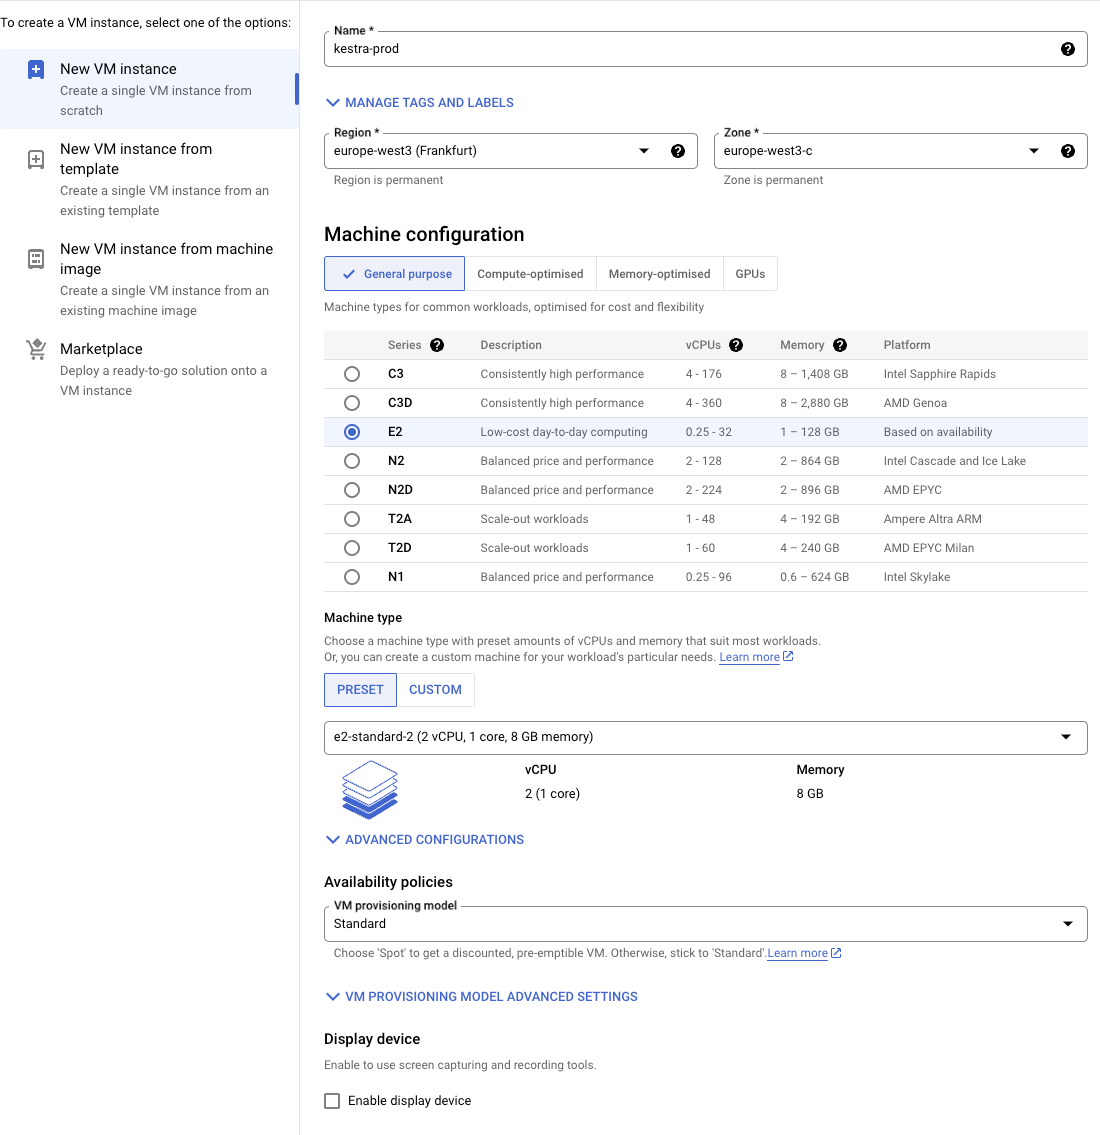

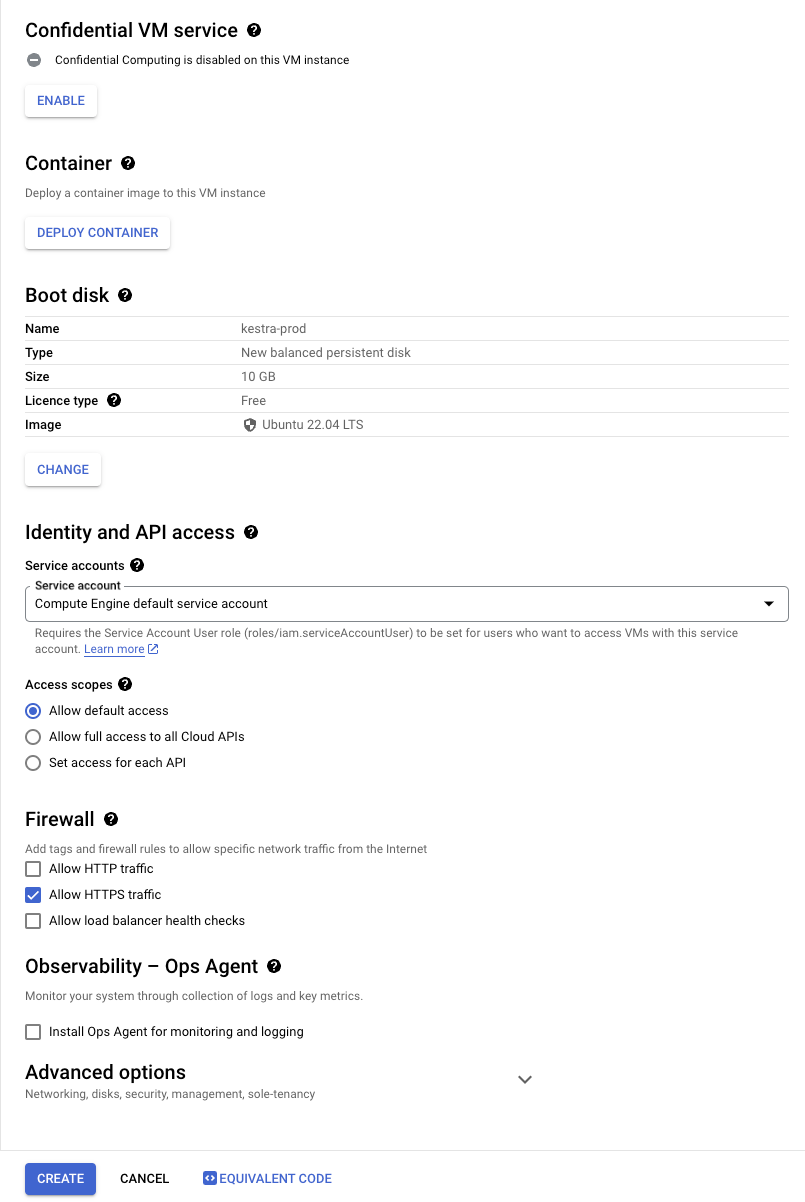
You can now click on "Create" and wait a few seconds for the VM instance to be up and running.
Install Docker
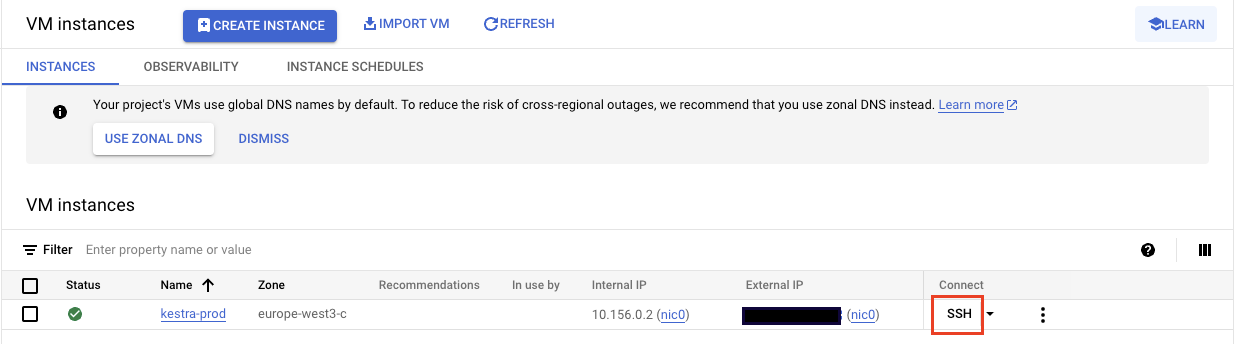
Click on the SSH button on the right side of the VM instance details to SSH into the VM instance terminal. Click on the Authorize button in the pop-up to authorize the SSH connection into the VM instance.
Kestra can be started directly from a .jar binary or using Docker. We’ll use Docker here for a quicker setup.
Install Docker on the GCP VM instance. You can find the last updated instruction on the Docker website.
To check your installation, run sudo docker version and sudo docker compose version. You're now ready to download and launch the Kestra server.
Install Kestra
Download the official Docker-Compose file:
curl -o docker-compose.yml \
https://raw.githubusercontent.com/kestra-io/kestra/develop/docker-compose.yml
Use an editor such as Vim to modify the docker-compose.yml, set basic authentication to true, and configure your basic authentication credentials to secure your Kestra instance.
kestra:
  server:
    basic-auth:
      enabled: true
      username: admin@kestra.io # it must be a valid email address
      password: kestra


Note that if you haven't set up basic authentication in the previous step, your Kestra instance will be publicly available to anyone without any access restriction.
You can now access your Kestra instance and start developing flows.
Launch Cloud SQL
This first installation relies on a PostgreSQL database running alongside the Kestra server - on the VM instance (see the PostgreSQL service running thanks to the docker-compose).
For a simple proof of concept (PoC), you can keep the Postgres database running in Docker.
However, for a production-grade installation, we recommend a managed database service such as Cloud SQL.
Create a Cloud SQL database
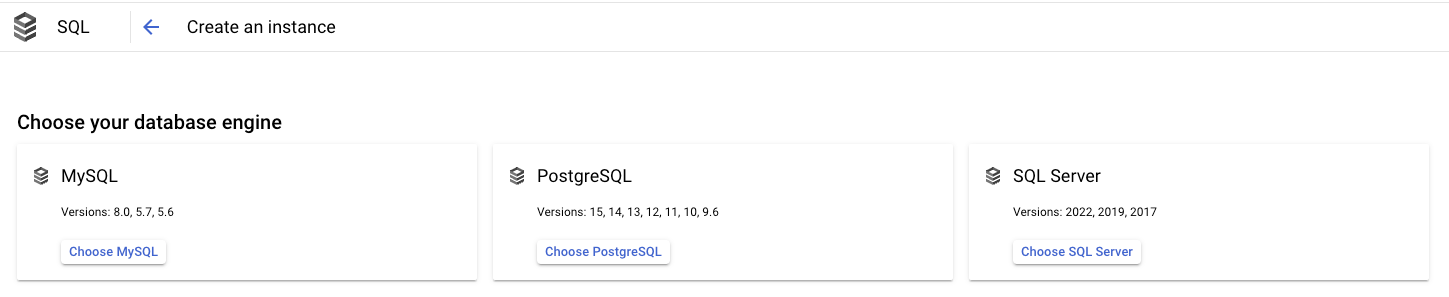
- Go to the Cloud SQL console.
- Click on
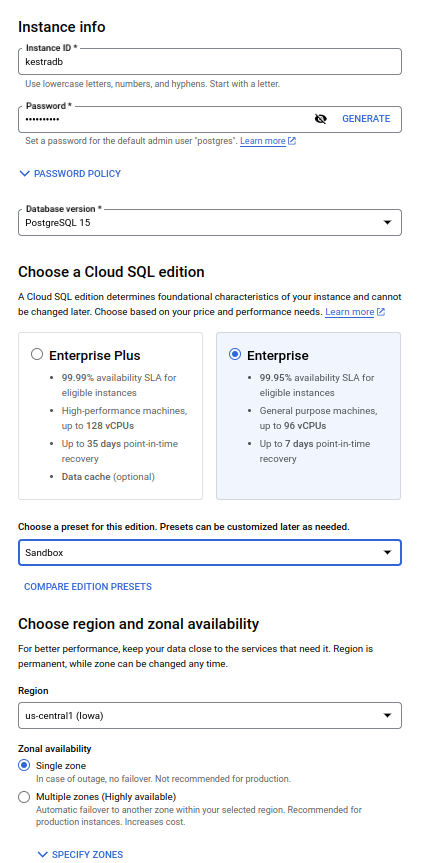
Choose PostgreSQL(Kestra also supports MySQL, but PostgreSQL is recommended). - Put an appropriate Instance ID and password for the admin user
postgres. - Select the latest PostgreSQL version from the dropdown.
- Choose
Enterprise PlusorEnterpriseedition based on your requirements. - Choose an appropriate preset among
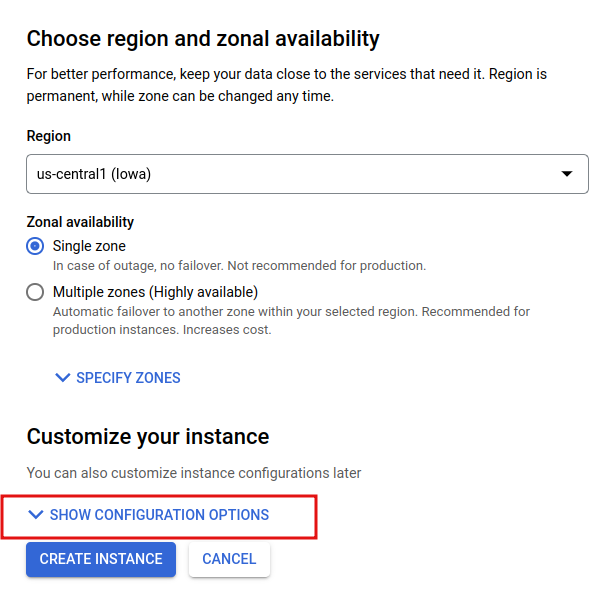
Production,DevelopmentorSandboxas per your requirement. - Choose the appropriate region and zonal availability.
- Expand Show
Show Configuration Optionsat the bottom of the page.
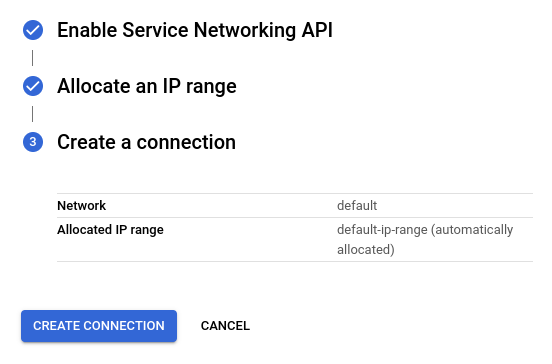
Enable VM connection to database
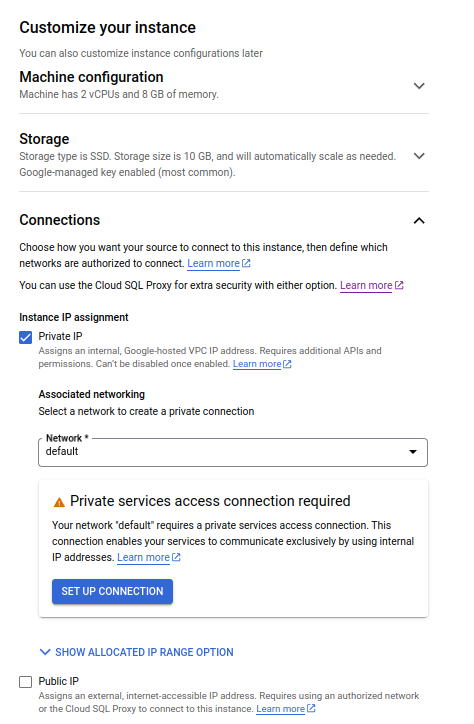
- Expand the
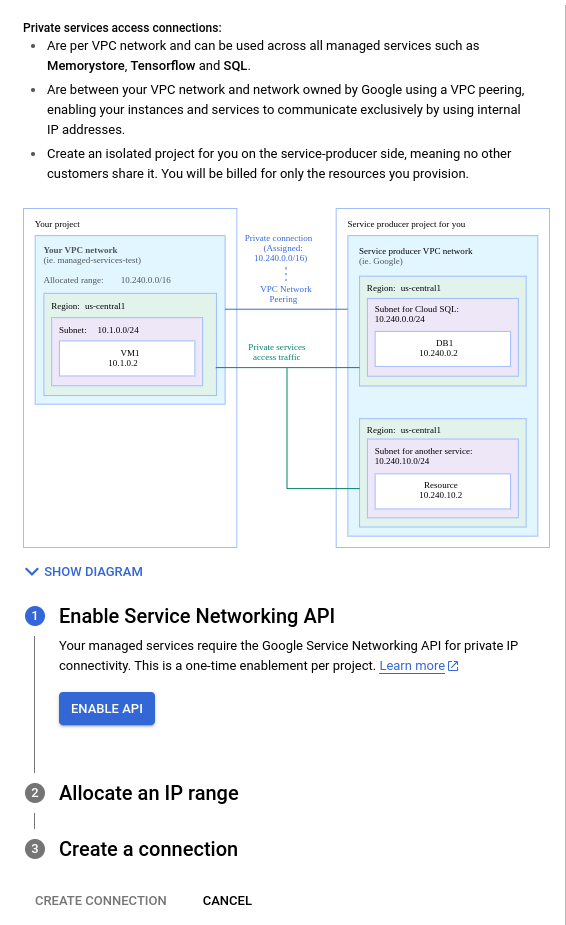
Connectionssection from the dropdown. - Uncheck Public IP and check Private IP. If this is your first time using a Private IP connection, you will be prompted to
Setup Connection. - You will then need to choose
Enable APIon the right hand side pop out. - Choose
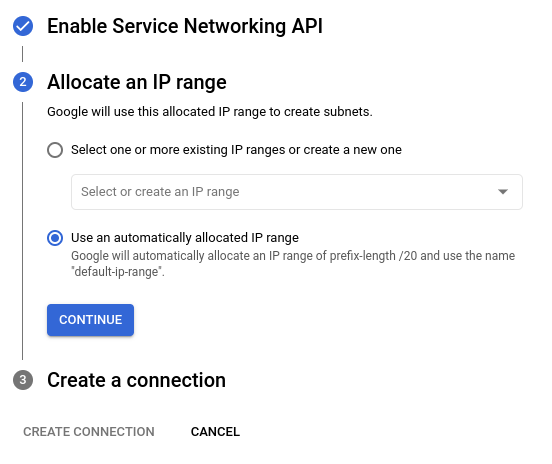
Use an automatically allocated IP rangeand clickContinue. - Click on
Create Connection.
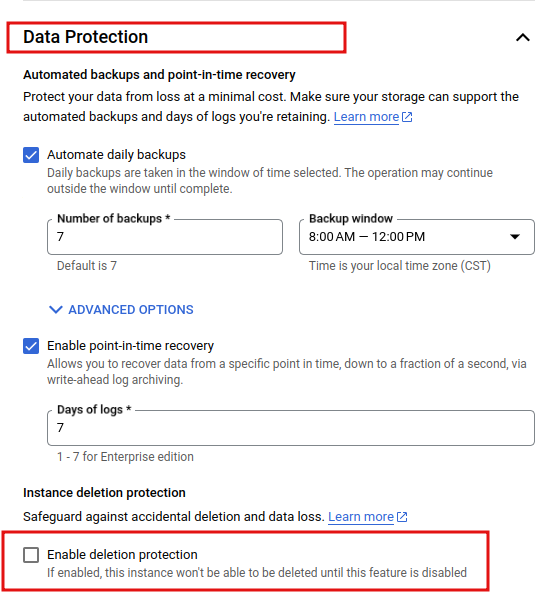
Enable Deletion
If you are just testing or would like to be able to delete your instance and all of it's data:
- Expand out the
Data Protectionon the left hand side and make sureEnable deletion protectionis UNCHECKED
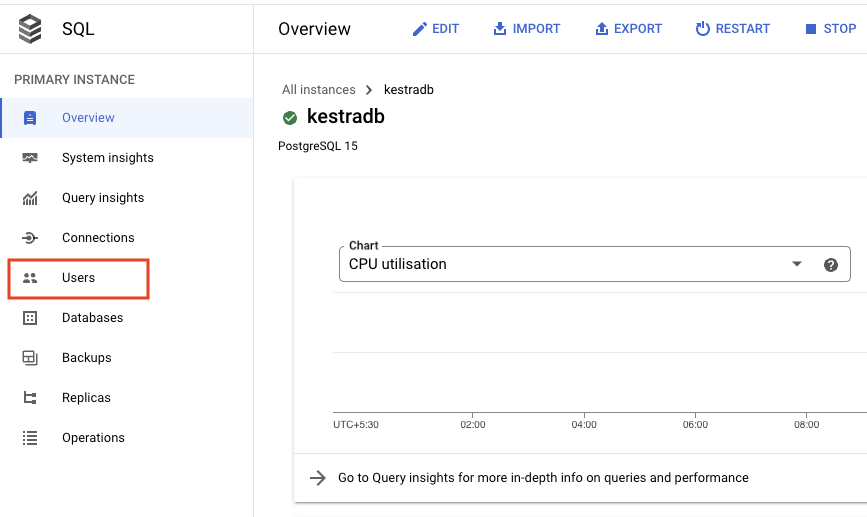
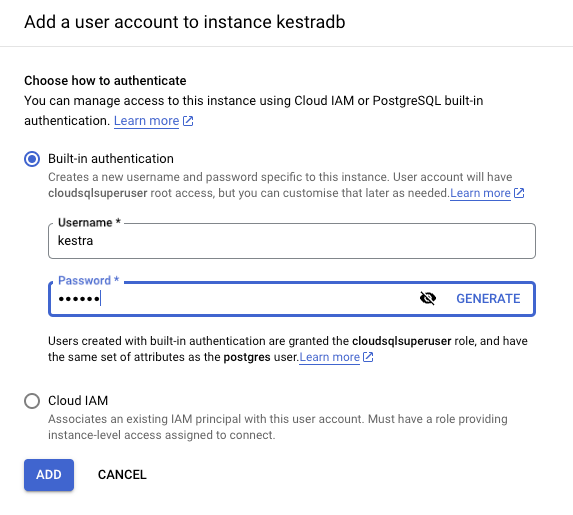
Create database user
- Go to the database overview page and click on
Usersfrom the left-side navigation menu. - Click on
Add User Account. - Put an appropriate username and password, and click on
Add.
Create Kestra database
- Go to the database overview page, and click on
Databasesfrom the left side navigation menu. - Click on
Create Database. - Put an appropriate database name, and click on
Create.
Update Kestra configuration
In the docker-compose configuration, edit the datasources property of the Kestra service in the following way:
datasources:
  postgres:
    url: jdbc:postgresql://<your-db-external-endpoint>:5432/<db_name>
    driverClassName: org.postgresql.Driver
    username: <your-username>
    password: <your-password>
And delete the depends_on section at the end of the YAML file:
depends_on:
  postgres:
    condition: service_started
Because you now use the Cloud SQL service, you don't need the Postgres Docker service anymore. Remove it from the docker-compose.yml file.
In order for the changes to take effect, restart the docker services with sudo docker compose restart or sudo docker compose up -d.
Configure GCS
By default, internal storage is implemented using the local file system. This section will guide you on how to change the storage backend to Cloud Storage to ensure more reliable, durable, and scalable storage.
- Go to the Cloud Storage console and create a bucket.
- Go to IAM and select
Service Accountsfrom the left-side navigation menu. - On the Service Accounts page, click on
Create Service Accountat the top of the page. - Put the appropriate Service account name and Service account description, and grant the service account
Storage Adminaccess. Click Done. - On the Service Accounts page, click on the newly created service account.
- On the newly created service account page, go to the
Keystab at the top of the page and click onAdd Key.From the dropdown, selectCreate New Key. - Select the Key type as
JSONand click onCreate. The JSON key file for the service account will get downloaded. - We will be using the stringified JSON for our configuration. You can use the bash command
% cat <path_to_json_file> | jq '@json'to generate stringified JSON. - Edit the Kestra storage configuration.
kestra:
  storage:
    type: gcs
    gcs:
      bucket: "<your-cloud-storage-bucket-name>"
      project-id: "<your-gcp-project-name>"
      serviceAccount: "<stringified-json-file-contents>"
In order for the changes to take effect, restart the docker services with sudo docker compose restart or sudo docker compose up -d.
Next steps
This guide walked you through installing Kestra on a GCP VM instance with Cloud SQL database and Cloud Storage as storage backend.
This setup provides the easiest starting point for running Kestra in production on a single machine. For a deployment to a distributed cluster on GCP, check the GKE Kubernetes deployment guide.
Reach out via Slack if you encounter any issues or if you have any questions regarding deploying Kestra to production.
Make sure to also check the CI/CD guide to automate your workflow deployments based on changes in Git.
Was this page helpful?